Dolly Quilt Tutorial

I made a New Year’s resolution to myself to try and make more birthday presents this year.  I am not doing too badly, which is partly why I haven’t managed to blog very much…
For Margot and Kate – both recently 3 years old, I made dolly blankets.
For Margot I crocheted a granny square blanket and made a small patchwork quilt and pillow.
The crochet blanket was a single granny square made really big (12 rounds) and then finished off with a row of double crochet all the way around.  I alternated the colours every two rounds. 
See Pip’s blog for how to make a Granny Square.
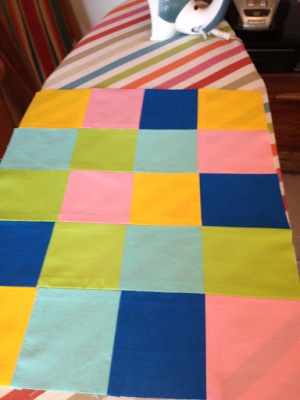
Then I made this mini patchwork quilt…
To make quilt measuring 13″ by 17″ you’ll need:
20 mixed 3.5″ squares
1 piece backing fabric 14″ x 18″
1 piece wadding/batting 14″ x 18″
Thread, scissors etc
 
First cut out your squares.  It’s easier to cut with a roller if you layer the squares rather than cut single layers of fabric.  The blade works better and it’s also quicker.  I used a bought plastic square (er…not sure what the official name for that is) but a piece of stiff cardboard works just as well.
Lay out the pattern however you like it – I find it quite useful to take a picture here so that you can refer back to it as once you start picking up squares to sew together it can get a bit confusing.
A very useful tip from my sewing teacher is to use masking tape or something similar on your machine to keep you straight.  She was showing it to someone making curtains but I have used it permanently since and it has really helped keep me on the straight and narrow.
 
Take the first and second squares and lay them front side to front side facing and sew with a 1cm seam along one side (so your tape should be 1cm out).  Now open it out and lay the third square on the second square and repeat – you are making a column.  Refer to your photo if you are getting muddled.
Do this for all columns and press seams flat. Usually with quilting seams are pressed to one side but I want this to sit completely flat.  Plus it’s doesn’t need the extra strength that pressing to one side gives.
Lay two columns together RSF (right sides facing) and making sure all the square joins are as close to matching as possible, sew with a 1cm seam all the way down to the bottom.  Then join the rest of the columns in the same way. 
Press all your seams flat and iron the front side too.  Now trim your backing fabric and your batting to match this size.
The next thing I did for ease (and because it is just a dolls blanket!) is quilt the batting to the patchwork.  Lay the batting on the back of the patchwork and slowly follow the squares either across or down (or both). 
Now lay this patchwork with it’s attached batting face down on top of the backing fabric facing up (so RSF).
 Tidy up the edges.
Then sew around all edges with 1cm seam leaving a 10cm gap in one edge.  In this picture I have rolled the quilt to make it easier for me to keep straight (I have a tendency for slightly wonky sewing).
Trim the corners.
Turn out through the hole.
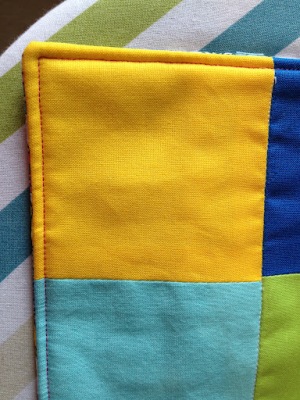
Press the seams on the opening so that you can stitch up that hole as you top stitch all the way around.
 
Et voila, one satisfied customer!

Blinds and blankets…

This week I finished two time consuming projects…first up…my blinds!

I have to admit that the extra time taken measuring, re-measuring, tacking everything in sight and taking it slowly did pay off. They went up and I’ve had to make no adjustments. I’m really pleased with how they look. Hooray for thermal lined and interlined cosy blinds shutting out that freezing air! Brrrr.

Another cosy item (which totally clashes with my blinds!) is a massive snug granny blanket that I have been picking up and putting down for a year! It is also finally finished and doing it’s job over my legs of an evening. It was a bit of an experiment with colours and some I like and some not. Next, I’m going to try a ripple blanket but in cotton this time.

There are two whole boys under there!

Little makes…

So much to do, so little time…so I have been making some little things to keep me crafty (=happy).  Both of these ideas came from Pinterest…where else!
The comb took about 10 mins to make and it doesn’t really need explaining…get thread, buy comb and wrap…really simple but I like the effect. The idea came from here via Pinterest.

The scarf took about an hour and a half. The pattern is free from this blog. The pattern is in American terminology so translate as follows:
single = double
double = treble
half double = half treble
I did repeat row 2 to make it slightly wider. I also kind of did my own thing at the end to make it a bit neater. I sort of went around the bottom with a scallop if you know what I mean!
Bye for now, Nix!

Stones…

My friend Alice over at Mrs Maker blogged about beautiful decorated stones the other day (she saw them here)…I am in awe and just waiting for my pot of ‘mod podge’ to arrive so I can get started. It looks amazing!! As well as making some name stones and some picture stones, I am going to make stone noughts and crosses to play with on the beach using sticks or marks in the sand as the grid. I can’t wait to sew a little pouch to keep them in.
So Alice’s blog post made me think about how much I love stones too…I am quite picky about my stones though. When we search for them on the beach I like particular shapes and an evenness of colour and texture…I sit looking for stones all around me with my bucket at my feet while the children run around collecting. They show me their offerings and they get a stock answer…either ‘accept’ and then I throw the stone in my bucket or ‘reject’ and then I throw the stone over my shoulder. The anticipation is tense and dramatic. They love waiting to see if they have found a good one, stone perfection. Sometimes they try to get me ‘pretend’ cross by bringing me ugly duds and watching them fly over my shoulder with the cry ‘reject!’ getting louder! Last time we did this, loads of other children started getting in on the action and bringing their stones for assessment, in the end we had to stop not least because it is never a good idea to throw stones over your shoulder when surrounded my children!*
Zac last August on Charmouth Beach (stone heaven)
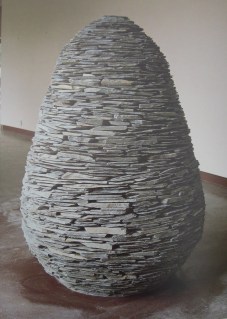
So, I think I first fell for stones during my A-level art course at secondary school. I did a project on Andy Goldsworthy and I loved his work with perfect stones and beautiful leaves and mounds of earth and ice and wood…you get the idea.
I used to love to tower the stones up and leave them for people to look at and knock over. I also admire the skill of the stone balancers. There is this one guy that comes along to the beach in Lyme Regis in the summer, what a skill to feel the distribution of weight in a lump of rock and balance it like that.
Other things I have done with stones include….
Crocheting a cover for a stone…I followed the pattern I found here. I know it sounds mad and it’s definitely one of the crafty moments Ed (and a fair few others) have completely failed to ‘get’. (Please note, if you love this and decide to go for it yourself, do read through the comments section of this link first as there are a couple of errors corrected in there).
Stone decorating with the children at Gabe’s 4th Birthday party this year…all inspired by the best stone story ever…
‘Bonting’ by Shirley Hughes…If you like stones you MUST read your children this sweet and beautifully illustrated story from the ‘The Big Alfie Out of Doors Storybook’. My boys love it. So anyway, thanks to Alice for reminding me of stones and leading me to this cool project and hurry up my mod podge!
Byeeeeee. Nix
* No children were physically or emotionally hurt in this stone hunt…Everyone got at least one ACCEPT! after a little coaching on the qualities of a fine stone!

Work in progess…another blanket!

Each square is eleven rounds of trebles and takes about two nights to make. When I was on holiday in Cornwall with Mum and the boys I did one each night but at home there are too many jobs to do after the children are in bed. I need to make eight more squares, then go around each one with chocolate brown wool and then stitch them all together and do a nice edging…I am sure it will be done before the weather starts to get cold.
Crochet is a great craft to have in a bag by the sofa, it’s so easy to pick up and put down and it really doesn’t take long to learn. There are loads of videos on youtube…and if you live in or near Winchester in the UK…I would be happy to show you how! Also, if searching the web you should know that US have different terminology from the UK and the rest of the world.
If you want to start, you’ll need one crochet hook – a size 4 or 5 hook is always a good one. Then some yarn. Yarn (that’s wool or cotton or bamboo or synthetic or a mixture) can be really expensive so get a couple of balls of something cheapish to have a go on. You will also need a pair of scissors, a safety pin for when you need to put your work down and save your last stitch and a large blunt ended needle for sewing in all the ends. The best thing about crochet is that if you go wrong, you just pull the end of your yarn and do that bit again. This is a great site for learning crochet…meetmeatmikes also the new craft magazine Molly Makes has a crochet tutorial too.
Happy hooking y’all, Nix!

Craft book reviews

I have lots of lovely sewing, crochet and crafty books on my shelves. I was about to list my favourites when I realised that before you can review a craft book, you really should have made something from it. So the first two books I am going to review are by Pip Lincolne because I have made things from those and they also happen to be two of my favourites.
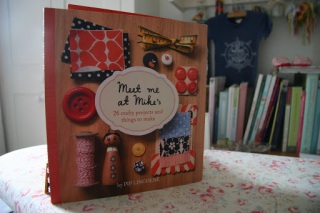
Meet me at Mike’s – by Pip Lincolne
This first book ‘Meet me at Mike’s’ was given to me by my husband for Christmas 2009. I am not kidding you, this book caused an epiphany! I read it from front to back to start with (I do that with craft books) and it completely re-ignited my long since missing crafty self. I don’t know where crafty self went for a while. I think I was pre-occupied with partying, socialising, husband hunting, moving, marrying and making a couple of babies. Anyway, once crafty self was released, I was eating, sleeping, dreaming crafts projects. So obviously this book is special for me. Some people go to India to find themselves. I opened this book.
So, information you might actually find useful about this book.  I love the style of writing. It’s like you are having a nice chat with an encouraging friend over a cuppa. It makes you feel like you really could make anything in the book.
As it happens, I chose to make two very simple things from this book as I needed some baby presents at the time.
Cutest ever baby knickers
I made the knickers quite a while ago and I don’t remember having any issues at all with the instructions. They were very cute indeed. I was slightly disappointed that the fabric I had chosen looked girlier than I had originally thought once they were made up. It meant I couldn’t keep them for youngest son. I did try but my husband vetoed it. They really did look super sweet though. Although, slightly distracting. Very hard to do anything other than squeeze chubby thighs.
I sent them to a friend for her baby along with a baby-grow which I had appliquéd with the same fabric. I would only change one thing if I made them again. I used a quilting cotton last time and next time I would use pre-used fabric such as an old pillowcase (as per book suggestion) or a dress making fabric that is slightly thinner than quilting cotton. I think they would be softer and more comfy straight away.
Teeny tiny goody two shoes
Gosh, I started these when I first got the book but I didn’t have any elastic so had to put them to one side (that is such an annoying thing to have to do!) I also didn’t really have a crafting space at that time so they got bumped down the list of more urgent and exciting things even when I did eventually have the elastic. I eventually finished them the other day and they are very sweet. I encountered a few frustrations in the final stages of putting them together but nothing to do with the instructions…I was just rushing instead of easing things along!  They are cute and pretty easy and would make a sweet newborn pressie.
 
Crocheted granny square
Well, this set me off on some whole new world of yarn and hooks and blankets and hats and books…even my previously crafty self had not knitted or crocheted. Anyway, once you get it, crochet is a piece of cake…It really is very simple and personally I think easier and quicker (I’m a bit of a results driven person!) than knitting. So I tried to follow Pip’s instructions and I nearly got there, but not quite. Having said that, I also couldn’t quite get it by following anyone else’s written instructions in books or online. No, it’s just a bit hard to learn to crochet by word alone. It all fell into place for me when I watched a few videos on youtube. Suddenly it all makes sense. Pip actually recommends this too. Better still, find someone to show you. I couldn’t find anyone to show me…I really tried too! I called several nursing homes looking for a granny who might like a slice of cake in exchange for a few hints and tips…no joy. I even called Age Concern who asked all the ladies on the Monday to Friday lunch clubs. Still No. Then I called craft and wool shops and asked about courses…Nothing! So in the end I figured it all out by looking at this book and watching clips on youtube …just make sure you are watching someone who is teaching it in the right language – American terms for crochet are different from the UK and the rest of the world.
Anyway, after making many squares in beautiful colours I realised how long it was going to take to make the hugeous blankie that I desired…all those colour changes and all those endy bits plus lots of sewing together…so I decided to make one humongous square. 
No sewing together and a lot less endy bits. It is so easy to make this blanket…if you like it you can literally do a few rows every night and in no time you have a lovely snuggly blanket.  I will blog more about crochet and yarn soon, in the meantime, you should really see Pip’s amazing blog if you are interested in knowing more about crochet.
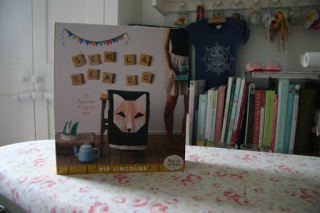
Sew, la, tea, do by Pip Lincolne
When this book came out, I had to have it, but sadly I also had to wait as it takes ages to get over here from Australia. I got it about two months ago. First off, it’s another great read. The patterns are cute and slightly more advanced than the last book…just the right amount. So yesterday I made a pair of these trousers for my children (yes one pair, both children – my youngest son is a giant two year old so he kind of shares some of his four year old brother’s clothes).

So the trousers took me 2 hours and 8 minutes including 1 x cup of tea (make and drink) and 1 x packet crisps (raid and eat).

I knew I would like these and probably want to make them again so I traced the pattern onto thicker paper to keep safe and use again. I then held the paper pattern pieces onto the fabric and cut out, partly with my rotary cutter (long straight bits) and fiddly bits with scissors. 
I should have pinned the pattern on to the fabric but I just wanted to get on so I didn’t. It came out fine anyway. Now, it said cut out each part twice but it didn’t say make sure you turn the pattern over before you cut out second one! Fortunately my fabric was identical back and front so when I forgot to do this it didn’t matter. Phew! Also my fabric was stripy and I forgot to make sure the stripes were straight on the leg bits, luckily they were.
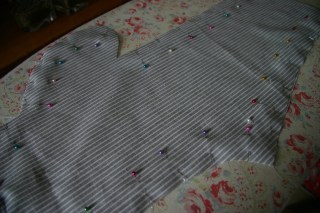
From there I followed the pattern to the letter…I pin like this… I was shown how to do this and it’s a good tip as you can sew over the needles and they are also easy to remove if you don’t want to do that.
Also, I forgot that you only need to pin the part you are sewing. I got a bit carried away, pinned the backs together and then realised I only need to pin one section, sew, then open out. Durr!
After that, my only other tip is to always read one step ahead. Then you kind get the aim of the part you are focussing on at the time.
I added small sewn up ‘turn ups’ as they were too long for my two year old and I like turn ups. Stitched ones are good as they don’t get t full of sandpit. I folded them up three times as I wanted to be able to let them down later.
I am really pleased with them. I think they are really sweet. Unfortunately as they don’t have Lightning McQueen on them they were received very cooly by my four year old. My two year old has yet to be corrupted by the world so he quite likes them although I had to promise him that he could have a go with my camera in order to get this picture.
So the next thing I am going to make (in a minute! Hurrah!) from this book is actually not a pattern but the cute bunting from the front cover. It’s so colourful and mini. I think it would look so nice adorning a child’s headboard (yes, one past the age of putting things around necks) or the doorway to your tent or even your bathroom…I have to make it as I have not been sleeping well thinking about making it. That is nuts isn’t it! I know it is.
So, just to summarise, and in case you hadn’t already gathered, I love these two books, the pictures, the patterns, the illutrations, the words, the fonts, the lot…and I also love the blog!
Turrah for now, Nix!